
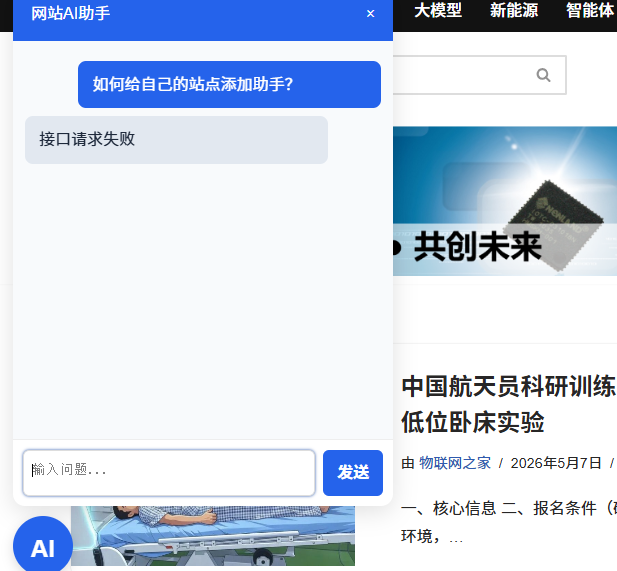
通过 WP 自定义 AJAX 接口中转请求,密钥存在 WP 后台,前端无法窃取,适合正式网站。
步骤 1:主题 functions.php 添加后端 AI 接口代码
外观 → 主题文件编辑器 → 找到functions.php,底部追加:
// 1. 后台设置字段,填写AI密钥
add_action('customize_register', function($wp_customize){
    $wp_customize->add_section('ai_assistant_setting', [
        'title' => 'AI助手配置',
        'priority' => 120
    ]);
    $wp_customize->add_setting('ai_api_key');
    $wp_customize->add_control('ai_api_key', [
        'label' => 'AI API密钥',
        'section' => 'ai_assistant_setting',
        'type' => 'text'
    ]);
    $wp_customize->add_setting('ai_model');
    $wp_customize->add_control('ai_model', [
        'label' => '模型名称',
        'section' => 'ai_assistant_setting',
        'type' => 'text',
        'default' => 'gpt-3.5-turbo'
    ]);
});

// 2. AJAX接口 登录/游客都可调用
add_action('wp_ajax_nopriv_ai_chat', 'ai_assistant_chat');
add_action('wp_ajax_ai_chat', 'ai_assistant_chat');
function ai_assistant_chat(){
    $key = get_theme_mod('ai_api_key');
    $model = get_theme_mod('ai_model');
    $msg = sanitize_text_field($_POST['msg']);

    $body = json_encode([
        'model'=>$model,
        'messages'=>[['role'=>'user','content'=>$msg]],
        'temperature'=>0.7
    ]);

    $resp = wp_remote_post('https://api.openai.com/v1/chat/completions', [
        'headers' => [
            'Content-Type'=>'application/json',
            'Authorization' => "Bearer {$key}"
        ],
        'body'=>$body,
        'timeout' => 30
    ]);

    if(is_wp_error($resp)) wp_send_json_error('接口请求失败');
    $data = json_decode(wp_remote_retrieve_body($resp), true);
    $reply = $data['choices'][0]['message']['content'] ?? 'AI无返回';
    wp_send_json_success($reply);
}

// 3. 加载前端JS与CSS
add_action('wp_footer', function(){
    // 这里放方案一全部CSS
    echo '
    <style>
    /* 粘贴方案一全部CSS代码 */
    </style>
    ';
    // 前端JS,改用AJAX调用本地接口,不暴露密钥
    echo '
    <script>
    document.body.insertAdjacentHTML("beforeend",`
    <button class="ai-assistant-btn">AI</button>
    <div class="ai-assistant-box">
        <div class="ai-box-header">
            <span>网站AI助手</span>
            <span class="ai-close" style="cursor:pointer;">×</span>
        </div>
        <div class="ai-chat-content"></div>
        <div class="ai-input-area">
            <textarea placeholder="输入问题..." id="ai-input"></textarea>
            <button class="ai-send">发送</button>
        </div>
    </div>
    `);
    const btn = document.querySelector(".ai-assistant-btn");
    const box = document.querySelector(".ai-assistant-box");
    const close = document.querySelector(".ai-close");
    const sendBtn = document.querySelector(".ai-send");
    const input = document.getElementById("ai-input");
    const chatBox = document.querySelector(".ai-chat-content");
    btn.onclick = ()=>box.style.display = box.style.display==="flex"?"none":"flex";
    close.onclick = ()=>box.style.display="none";

    async function sendMsg(){
        const text = input.value.trim();
        if(!text) return;
        chatBox.innerHTML += `<div class="user-msg">${text}</div>`;
        input.value = "";
        chatBox.scrollTop = chatBox.scrollHeight;
        // 调用WP本地AJAX接口
        const formData = new FormData();
        formData.append("action", "ai_chat");
        formData.append("msg", text);
        const res = await fetch("'.admin_url('admin-ajax.php').'", {
            method:"POST", body:formData
        });
        const json = await res.json();
        if(json.success){
            chatBox.innerHTML += `<div class="ai-msg">${json.data}</div>`;
        }else{
            chatBox.innerHTML += `<div class="ai-msg">${json.data}</div>`;
        }
        chatBox.scrollTop = chatBox.scrollHeight;
    }
    sendBtn.onclick = sendMsg;
    input.onkeydown = e=>e.key==="Enter"&&!e.shiftKey&&(e.preventDefault(),sendMsg());
    </script>
    ';
});
使用流程
- 外观 → 自定义 → AI 助手配置,填入 OpenAI / 国内大模型 API 密钥
- 保存后前台自动生成悬浮 AI 对话窗口
- 优势:密钥存在 WP 后台,前端无法盗取,支持缓存、访问限制
- 找到 functions.php 里
echo '<style> ... </style>'这一段 删除里面旧的全部 CSS 粘贴上面这份左侧 CSS 保存刷新页面,AI 按钮和对话窗口就全部跑到页面左侧了
/* AI助手悬浮按钮 - 左侧 */
.ai-assistant-btn {
    position: fixed;
    bottom: 30px;
    left: 30px; /* 原right改left */
    width: 60px;
    height: 60px;
    border-radius: 50%;
    background: #2563eb;
    color: #fff;
    border: none;
    font-size: 24px;
    cursor: pointer;
    z-index: 9999;
    box-shadow: 0 4px 12px rgba(0,0,0,0.15);
}
/* AI对话弹窗 - 左侧弹出 */
.ai-assistant-box {
    display: none;
    position: fixed;
    bottom: 100px;
    left: 30px; /* 原right改left */
    width: 380px;
    height: 520px;
    background: #fff;
    border-radius: 12px;
    box-shadow: 0 6px 24px rgba(0,0,0,0.12);
    z-index: 9998;
    overflow: hidden;
    flex-direction: column;
}
.ai-box-header {
    padding: 14px 18px;
    background: #2563eb;
    color: white;
    display: flex;
    justify-content: space-between;
    align-items: center;
}
.ai-chat-content {
    flex:1;
    padding:12px;
    overflow-y:auto;
    background:#f8fafc;
}
.ai-input-area {
    display:flex;
    padding:10px;
    border-top:1px solid #eee;
}
.ai-input-area textarea {
    flex:1;
    border:1px solid #ddd;
    padding:8px;
    border-radius:6px;
    resize:none;
    height:46px;
}
.ai-send {
    margin-left:8px;
    background:#2563eb;
    color:white;
    border:none;
    border-radius:6px;
    padding:0 14px;
    cursor:pointer;
}
.user-msg, .ai-msg {
    margin:8px 0;
    padding:10px 14px;
    border-radius:8px;
    max-width:85%;
}
.user-msg {
    background:#2563eb;
    color:white;
    margin-left:auto;
}
.ai-msg {
    background:#e2e8f0;
    color:#1e293b;
    margin-right:auto;
}

/* 移动端适配 左侧 */
@media(max-width:480px){
    .ai-assistant-box {
        width:calc(100% - 40px);
        height:70vh;
        left:20px;
    }
    .ai-assistant-btn {
        left:20px;
        bottom:20px;
    }
}
👀 阅读量:142 次